Over the past few months, we’ve been working on an exciting new feature—the Workflows tab!
Though website workflows can get technical quite quickly, they should also be easy to build… if the front-end is designed well. This is exactly what we set out to do at Ycode!
In our improved, intuitive workflow environment, you can build easy (or advanced) workflows using logical steps.
We’ll walk you through how to build workflows in Ycode and show examples of different actions that you can use for your web projects.
Step-by-step: Creating workflows in Ycode
Every workflow is triggered by a certain event and once it’s “on”, each step thereafter happens automatically in the application’s back-end. Kind of like a domino effect, except that you decide on the time that each domino falls.
Before you start building your own workflow, let us take you through the process of building workflows in Ycode.
Note that all workflow events will happen in the exact order you add them, so it’s good to map out beforehand what you want to have happen.
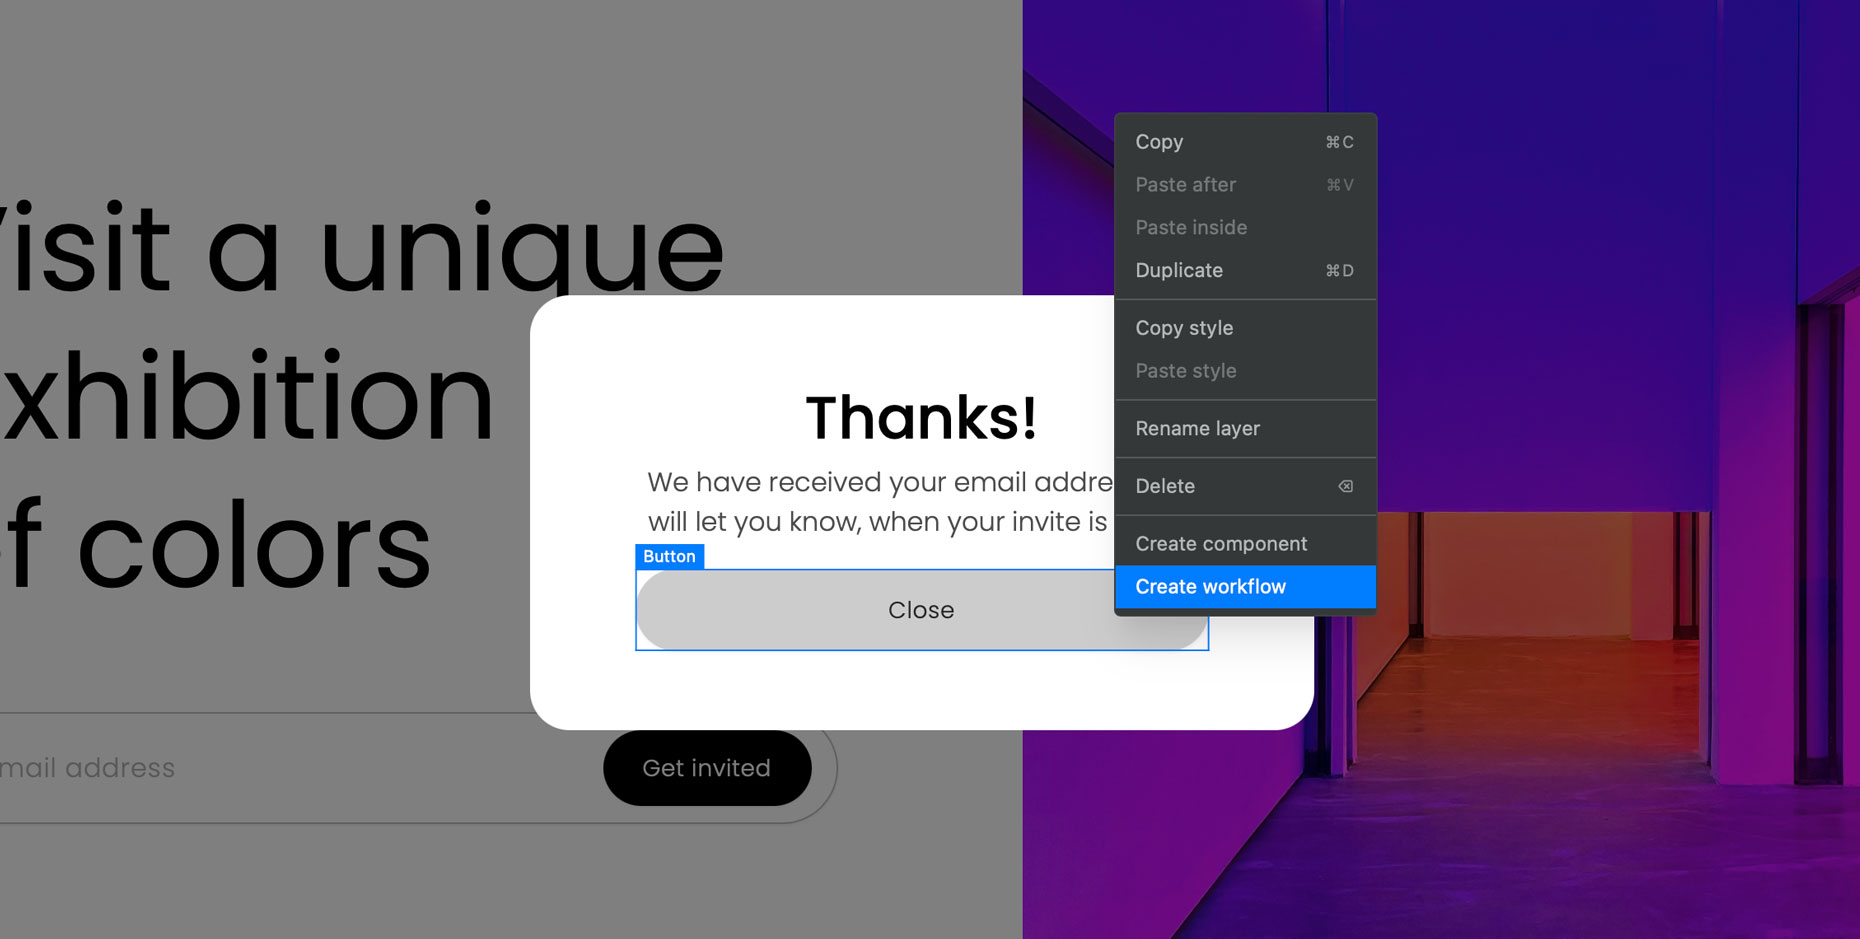
For our example, we want to show people a success "Thank you" message after they sign up and click on the submit button.
Build while you learn
You can clone the project we'll use for the example steps, you can see exactly how it's built as you read along.
Step 1. Set ID name
This step is optional. There are two ways to go about creating workflows.
Right-click on an element in your canvas and select Create workflow—Ycode will automatically create a unique ID name.
Set your own ID name and then start building your workflow in the Workflows tab.
Method 2:
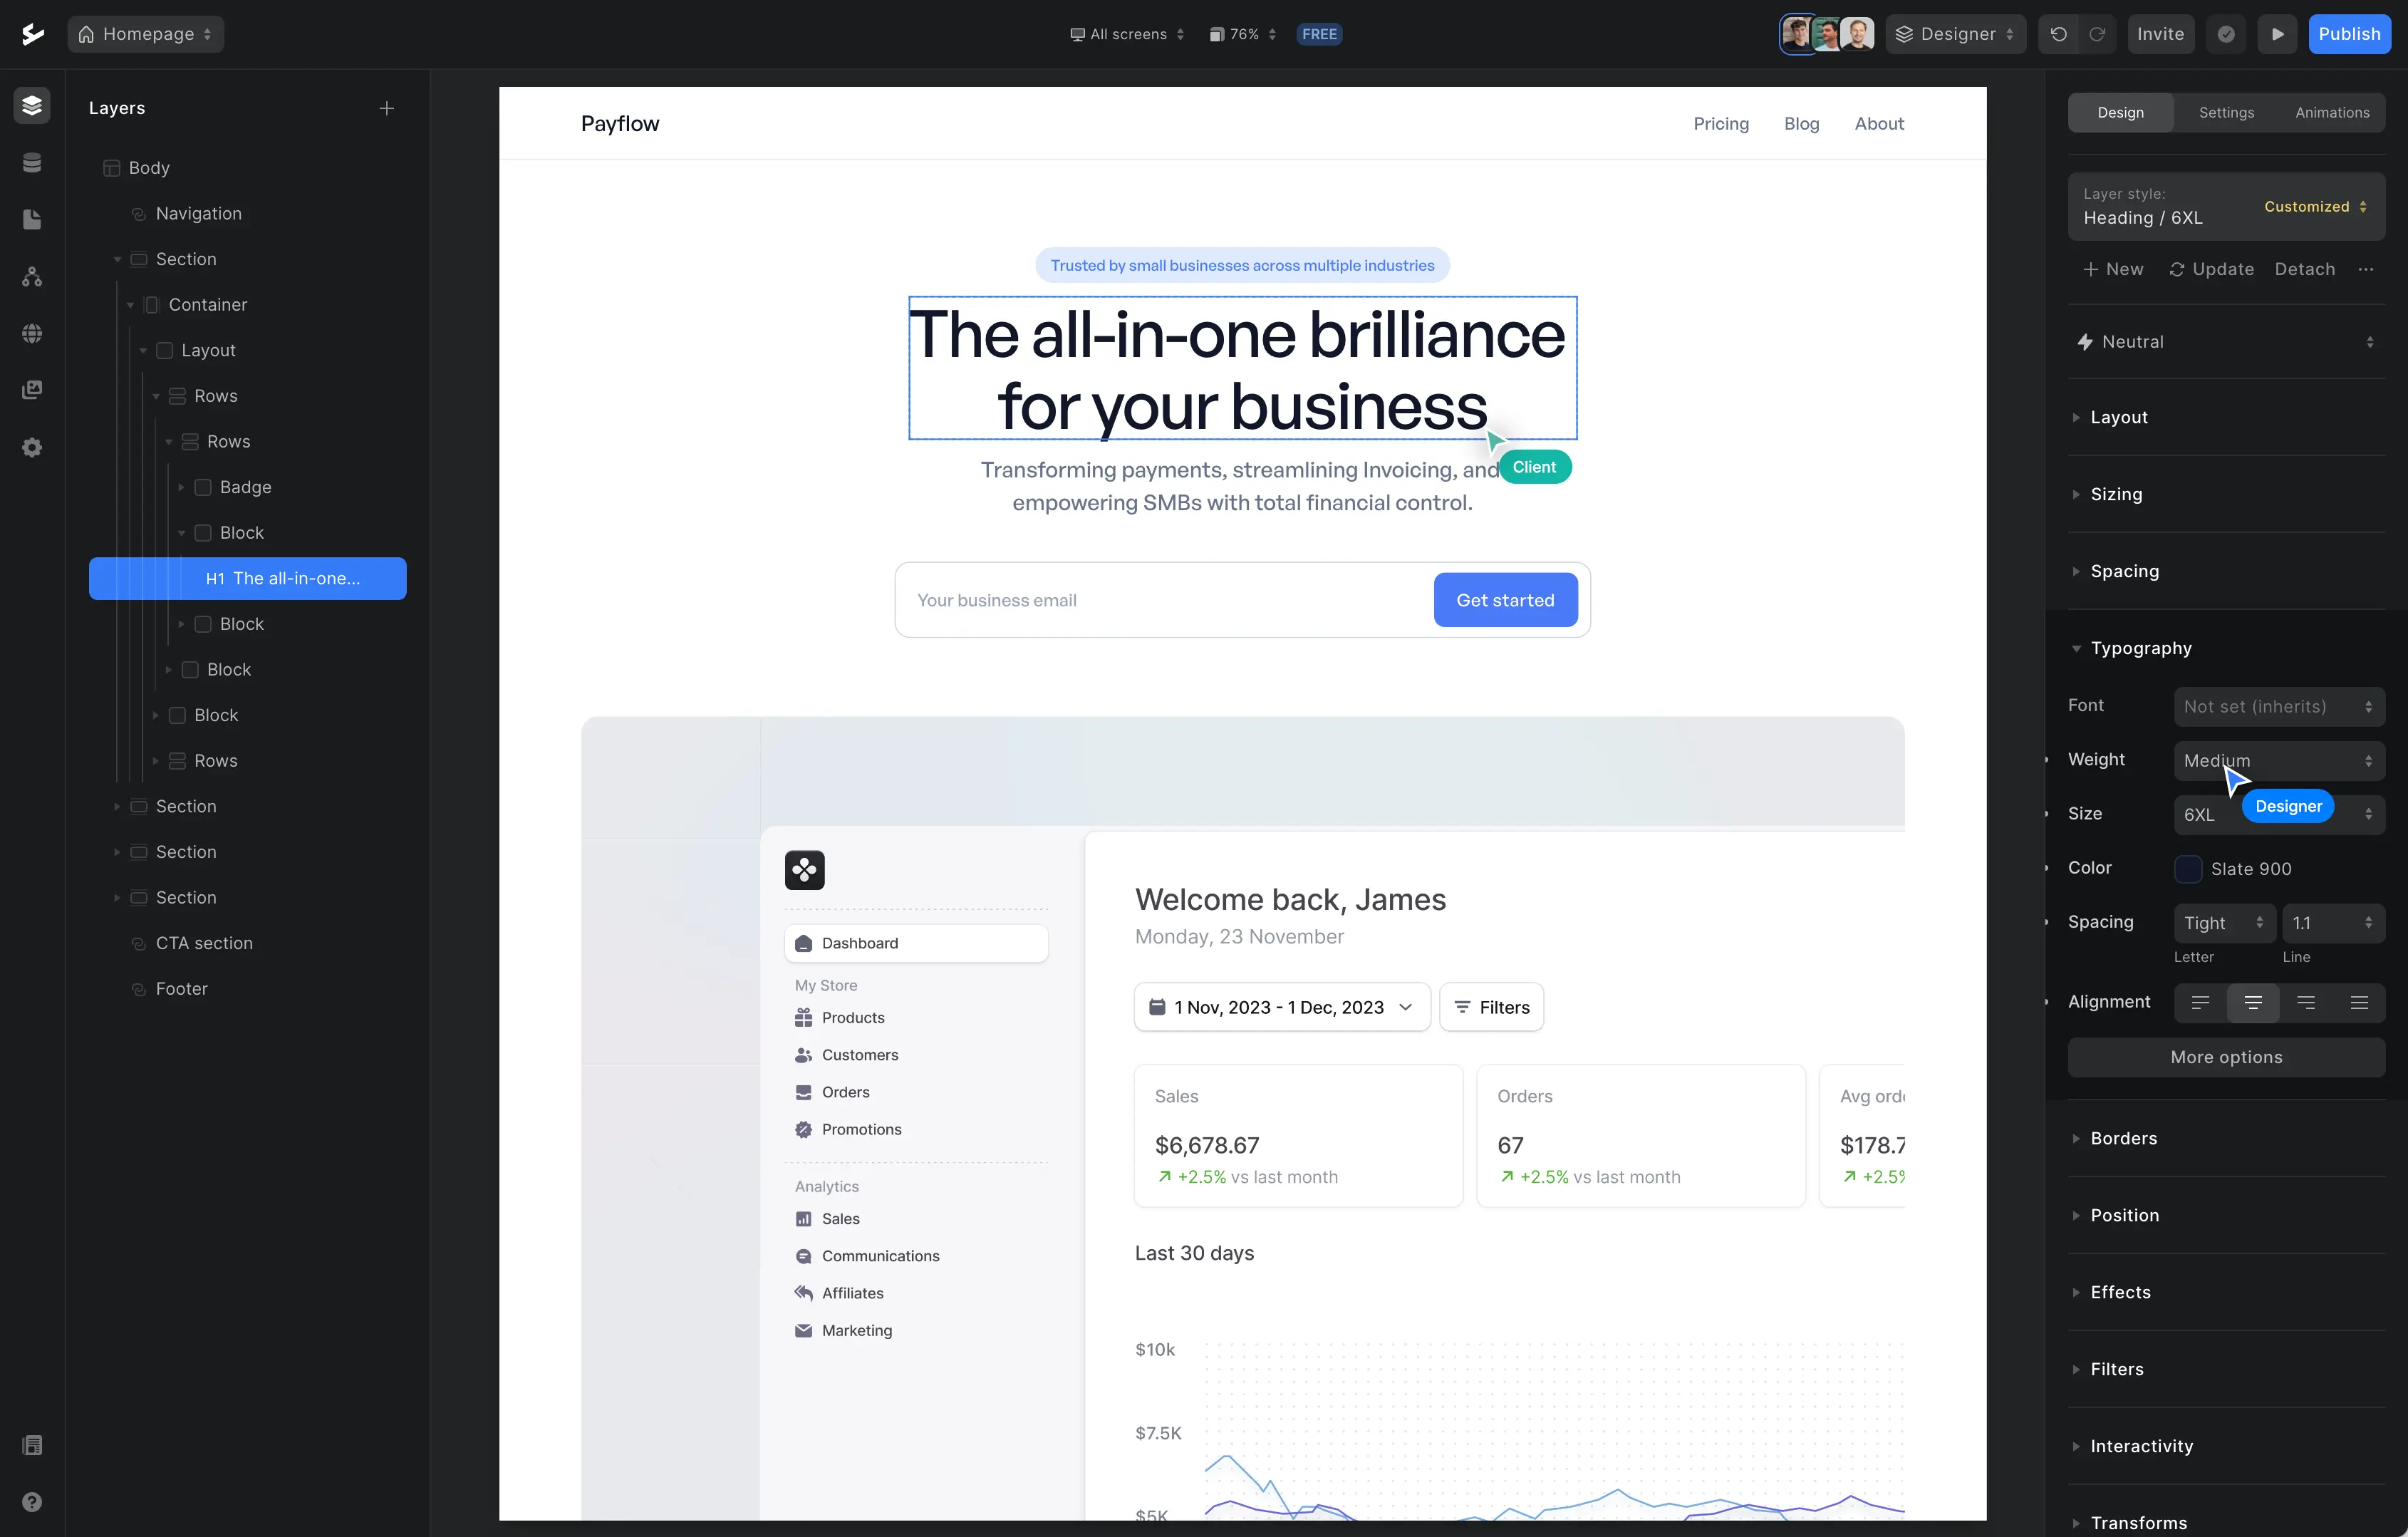
In your Ycode canvas, select the element that you want to create the workflow for. We’ll select the submit button in the contact form. Navigate to the Settings tab and add an ID name so you can identify the element when creating the workflow.
Step 2. Create workflow
If you used the first method in the previous step, you’re already in the Workflows tab. You can continue to step 4.
If you set your own ID name, first navigate to the Workflows tab in the Ycode editor (on your left-hand side). Then click on + Create workflow and add a workflow name. Finally, click on the blue Create workflow button (video below).
Step 3. Add event for button click
Note: Skip this step if you right-clicked to create the workflow in step 1.
To start a new workflow, we need to add the first event. Press Click here to add an event.
You’ll see different categories like General and Elements, and if you hover over them you’ll see the events for each category.
As the first event, we’ll open the Element category and select Clicked. In the dropdown menu, you can then select the ID name you set in the first step.
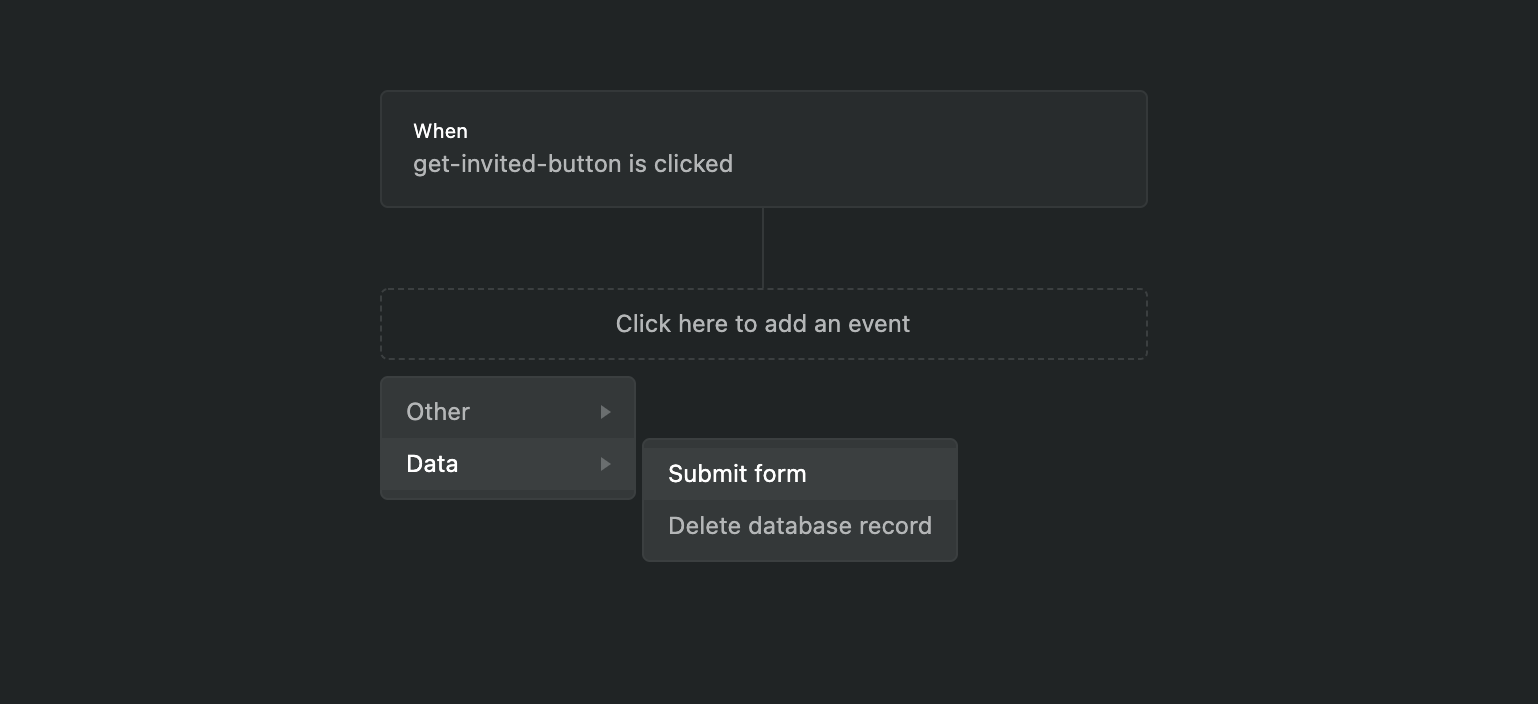
Step 4. Add event for form submit
As a next event, we’ll need the action that submits a form. Add a new event and click on Data and then Submit form.
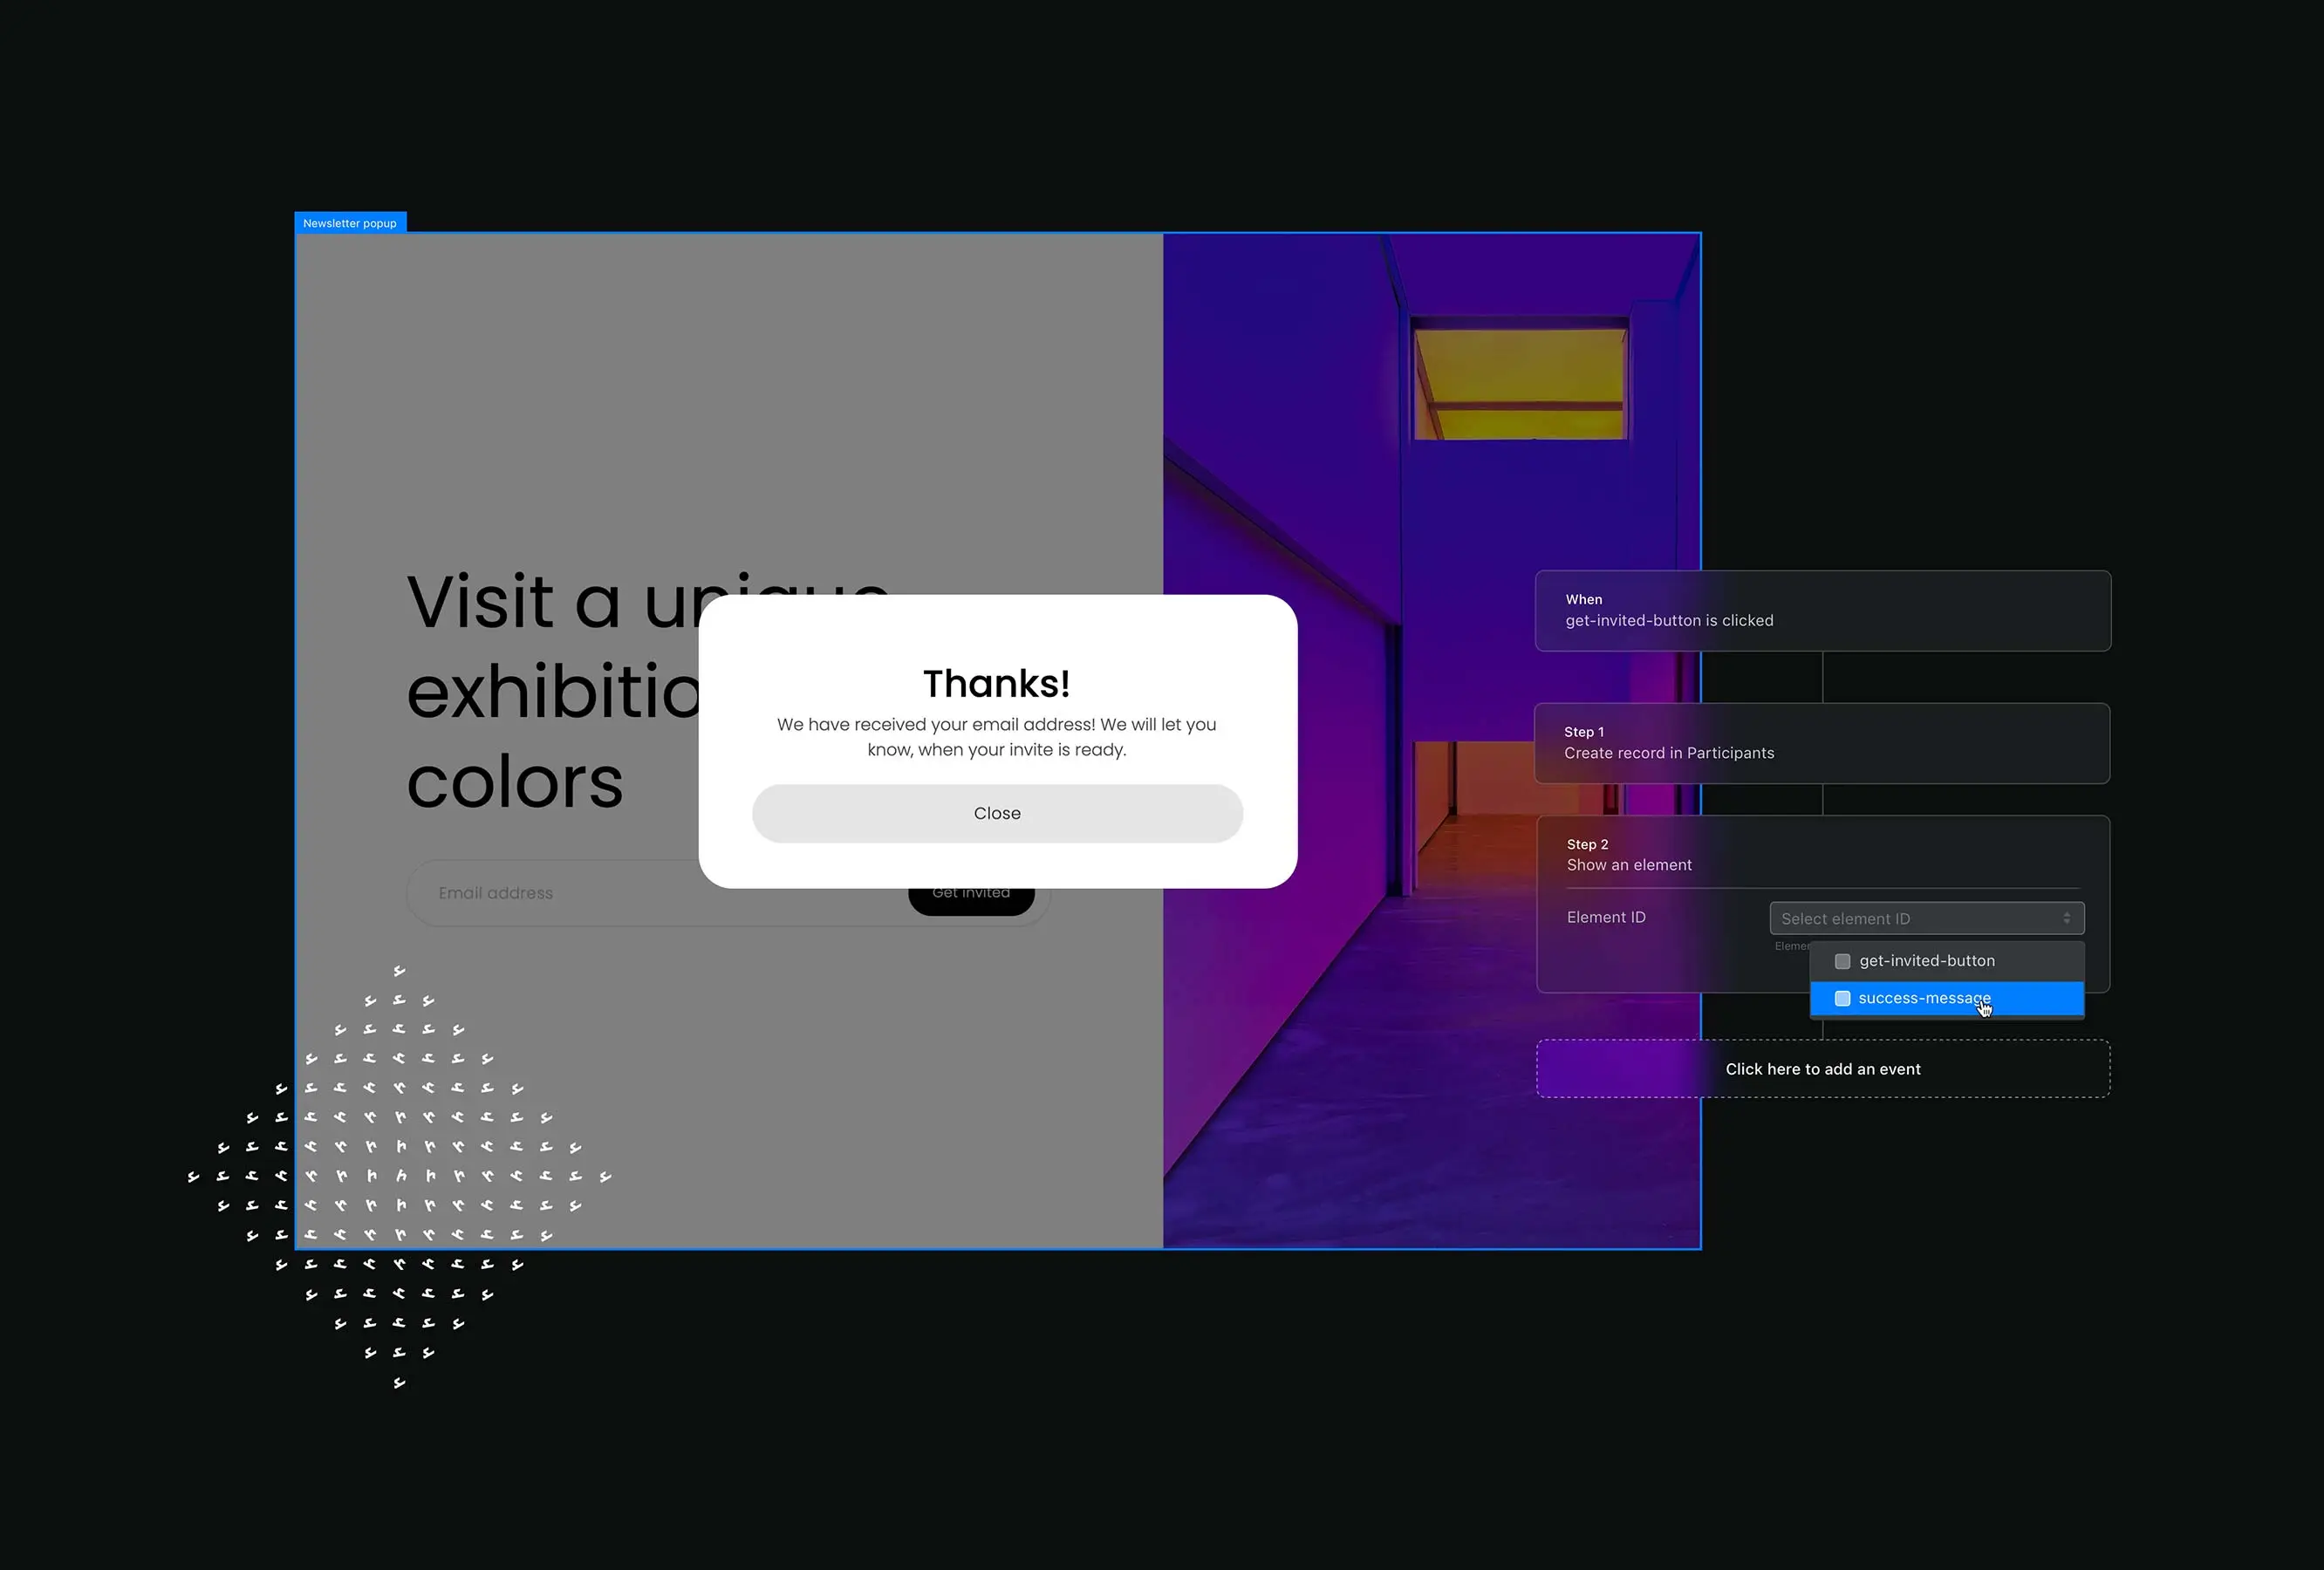
Step 5. Add event to show pop-up
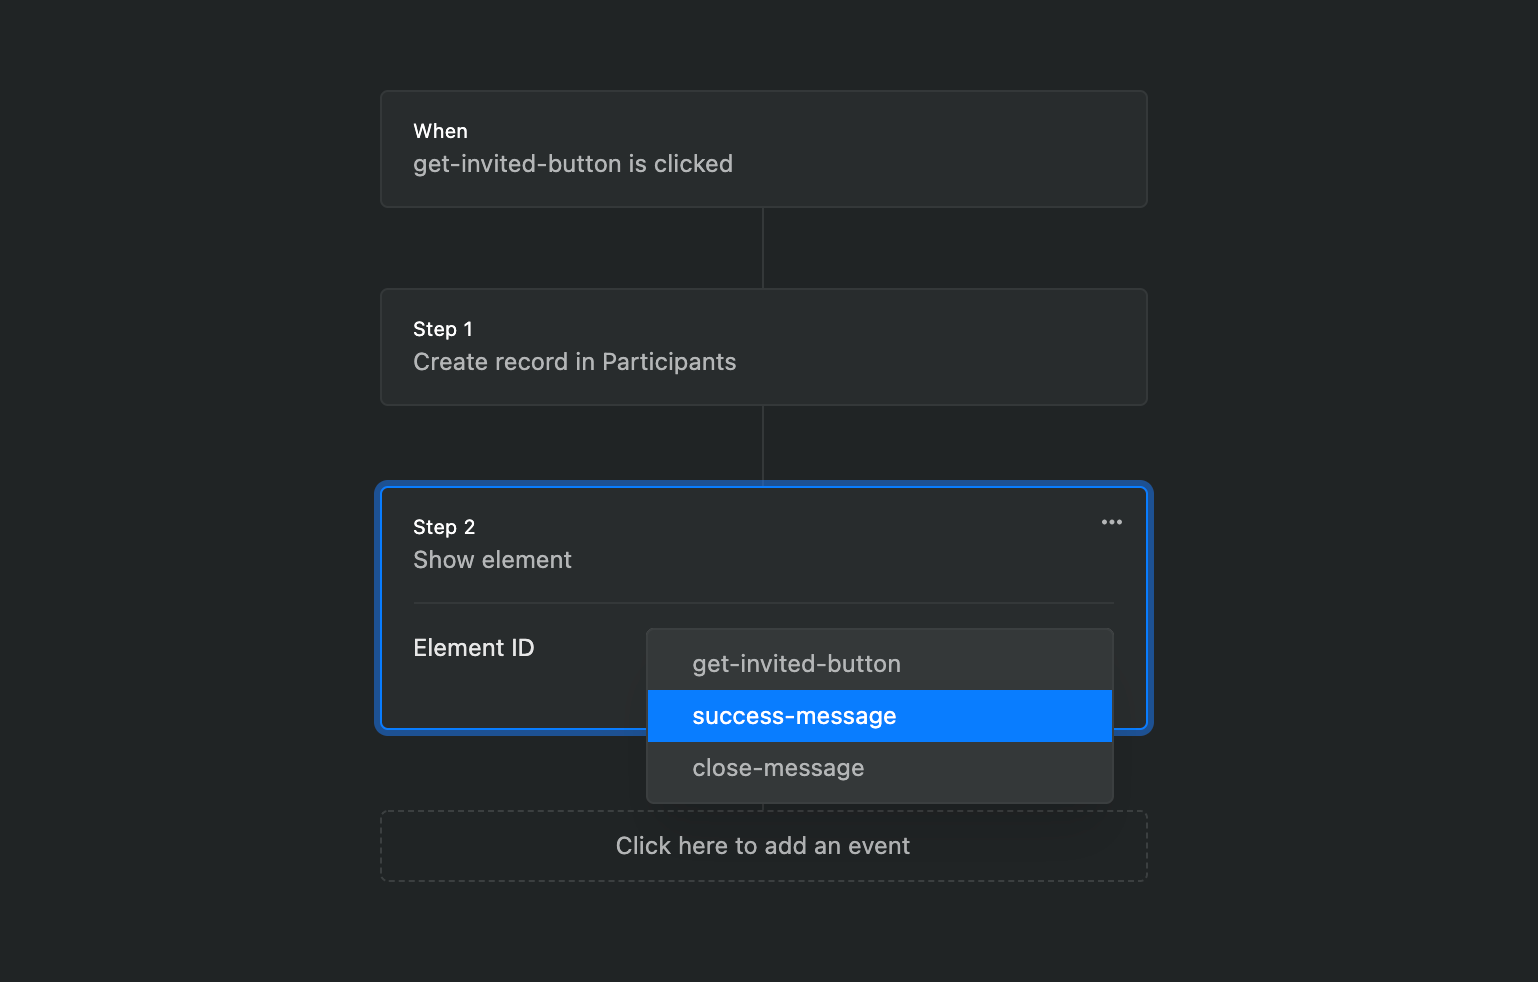
With the first step completed, we can add the additional actions that make the success message appear.
Add a new event and select Other and then Show element. Then select the Element ID from the dropdown menu.
Don't forget to hide the message by default, that can be done in your canvas. Open the Design tab, then Layout, and select the Hidden icon on the far right.
Step 6. Save workflow
Before you exit the Workflows tab, you first need to select the blue Save changes button on the upper-right.
Step 7. Create a second workflow
Now we need to create a new workflow that closes (or hides) the pop-up after a visitor clicks on the close button. In your canvas, select the element that's the close button. Then right-click and select Create workflow.
Step 8. Add event to hide pop-up
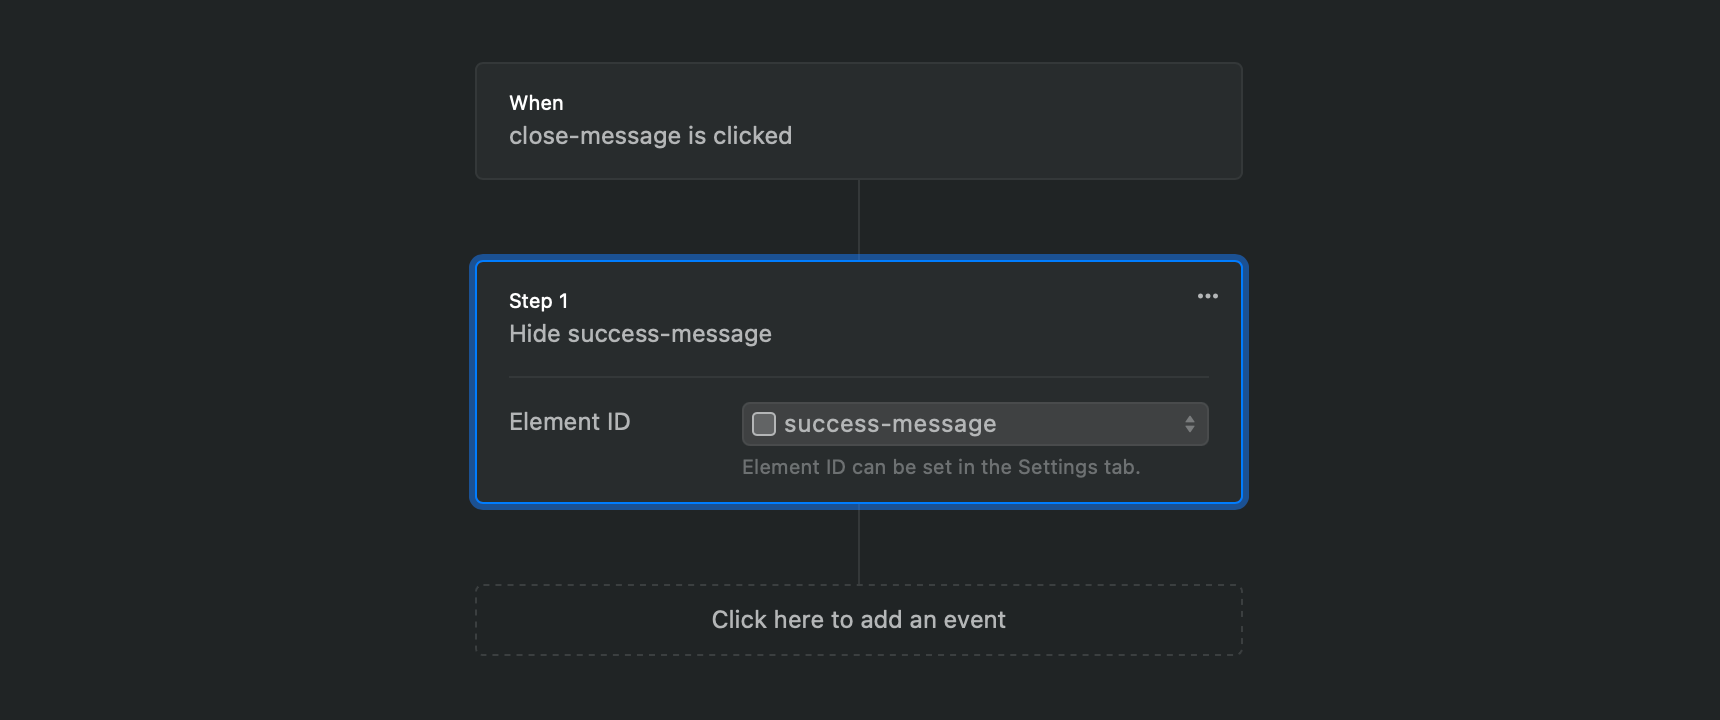
This event will hide the success message pop-up when the website visitor clicks on the close button.
By using the shortcut "right-click to create workflow" in the first step, the event for the button click will be automatically created in your new workflow.
For the second event, select Other and then Hide element. Then select the Element ID from the dropdown menu (same ID name as in step 5).
Step 9. Hide message by default
Back in your canvas, select the main layer that contains all elements that belong to your success message.
Then in the Design tab on the right, open Layout and select the Hidden icon on the far right.
Step 10. Test workflow
Now Save and Preview your project. Perform the actions and you'll see that your workflow does exactly what you set it to do.
You can always go back and add more events. For example, you might also want to send people a confirmation email. The number of events in one workflow is infinite, but you’ll often find that keeping things simple is the way to go.
Now let’s look at different types of workflows that you can build in Ycode.
4 use-case examples of Ycode workflows
Example 1: Delete a database record
This workflow is perfect for projects that include any type of dynamic content list. With the steps below, you can build a system where visitors can delete items from a list.
Preparation
This workflow requires you to have a database with data inside. Then, in your canvas, the database should be connected to dynamic elements.
Workflow
In your canvas, add a Delete button to a list with dynamic elements
Right-click element and select Create workflow
Add event: Data → Delete database record
Save workflow
See workflow in Ycode: Clone the example project below
Example 2: Get notified when someone signs up
This workflow is great when you want to receive an automated email notification every time someone creates an account on your website or web app.
Workflow
Select the element in the canvas and add ID name in the Settings tab (this could be a signup form completion button)
Right-click element and select Create workflow
Add event: Other → Send email → Fill in email form fields. Example:
To email: Your email address
Subject: You’ve got a new website signup!
Body: Yay! Someone signed up on your website. Log in to Ycode and check the user list in your database to see more details about this signup.
Save workflow
Example 3: Show or hide an element
This workflow makes elements appear or disappear when an action is taken on the page.
Examples
Show and hide a pop-up
Show and hide an information card when a button or icon is clicked
Preparation
For this example, we’ll create a workflow for a pop-up. As preparation, you’ll first need to build a pop-up in Ycode. You can clone this project to see how to build a pop-up.
Workflow
Navigate to the Workflows tab and select Create new workflow
General → Page is loaded
Other → Wait seconds → Add total seconds
Element → Show → Select element ID in dropdown
Save workflow
Navigate to the canvas
Right-click X (closing element) in the pop-up and select Create workflow
Add event → Element → Hide → Select element ID in dropdown
Save
Go back to the canvas and hide the pop-up by default. In the Design tab on the right, open Layout and then select the Hidden icon on the far right.
See workflow in Ycode: Clone the example project below
Example 4: Log out a user
This workflow logs out users from their profiles when you have user authentication enabled.
Preparation
For this workflow, user authentication needs to be enabled. Read how to set this up here. Then, users need to be present in your database (here’s how to add data). Thirdly, you will need to create a user profile page that contains a logout button.
Workflow
Select the element in the canvas and add ID name in the Settings tab
Right-click and select Create workflow
Other → Logout
Other → Redirect → Select homepage from the dropdown
Save workflow
How will you use workflows in your Ycode project?
We love to see real examples of Ycode builders. Add your project link in the comments or in the Ycode community and let us know which workflow you’ve used!
Get your project started today
Discover our intuitive visual editor, use built-in CMS collections, SEO features and launch your web projects with ease.